Start from the symptom, not the replacement part
For an industrial drive, the useful question is not whether a chain looks strong enough; it is whether the selected chain, sprockets, lubrication, and layout work together under the real duty. A tight spot can repeat once per chain loop or once per sprocket revolution. That difference immediately narrows the root cause: chain-local defects travel with the strand, while eccentricity and tooth problems stay with the sprocket.
Start at the machine, then use the industrial transmission chain options to identify candidates consistent with tight spot and stiff link. Before a candidate is accepted, classify the tight spot as chain-synchronous, sprocket-synchronous, or load-dependent before disassembly. This is deliberately different from choosing a familiar chain number first and trying to make the surrounding drive fit it later.
- Tight Spot
- Use this parameter to reject unsuitable options early, then retain the verified value for the final specification.
- Stiff Link
- Check this point at the machine and document any uncertainty that still requires a supplier drawing or manual.
- Sprocket Eccentricity
- Record this requirement with enough context that a second engineer can reproduce the same selection or diagnosis.
- Joint Contamination
- Capture this input from a drawing, measurement, calculation, or operating record before the decision advances.
- Cyclic Tension
- Treat this as a controlled variable; note its value, unit, operating state, and source in the job record.
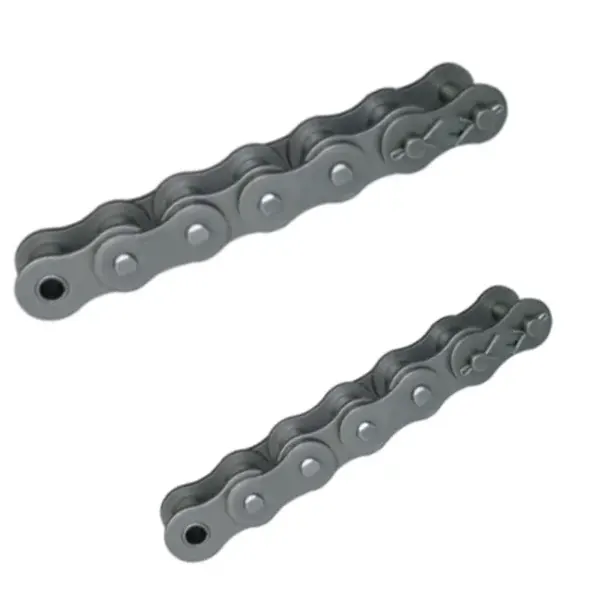
Pins and bushings must pivot freely as the chain wraps around a sprocket. Therefore, replace or correct the joint using the chain manufacturer procedure rather than forcing it free with repeated operation.
A stiff joint acts like a longer rigid segment and can lift from the sprocket or produce impact.
Determine whether the tight point follows the chain or sprocket
Work from mark the chain and sprocket, rotate the drive slowly, and note whether maximum tension returns with the same link or the same sprocket angle. The engineering link is periodicity separates a local joint defect from rotating geometry. One useful detail is that one stiff link appears at different physical positions but at the same chain mark, while an eccentric sprocket tightens the span at one shaft angle. Otherwise, adjusting overall slack before identifying periodicity can hide the diagnostic pattern.
Verify at the drive: measure span tension or deflection at several rotations and log both chain mark and sprocket position. Close this check only after you can classify the tight spot as chain-synchronous, sprocket-synchronous, or load-dependent before disassembly. Keep photographs or dimensions when they help preserve the interface condition.
Flex suspect joints individually
Base the decision on articulate each link near the marked chain location by hand after safe isolation and compare resistance with neighboring joints. It matters because pins and bushings must pivot freely as the chain wraps around a sprocket. During service, corrosion, dried lubricant, peened plates, or pressed connecting links can create a stiff joint. A poor assumption can cause a stiff joint acts like a longer rigid segment and can lift from the sprocket or produce impact.
Use this confirmation: inspect side clearance, pin ends, connecting-link plate position, rust, and debris at the suspect joint. Proceed when you can replace or correct the joint using the chain manufacturer procedure rather than forcing it free with repeated operation. If readings vary around the chain or sprocket, retain the spread instead of hiding it in one average.
Check sprocket eccentricity and shaft runout
The controlling action is to rotate each sprocket and measure radial runout or the change in chain span caused by pitch-radius variation. Its significance comes from an off-center sprocket changes effective center distance once per revolution. In the field, poor taper-bushing seating, dirt under a hub, bent shaft, or damaged bore can create eccentricity. The failure consequence is a cyclic tight spot can overload bearings and chain even if average slack is acceptable.
Check the hardware directly: use a dial indicator on suitable sprocket or shaft surfaces and compare readings around the full rotation. Approval requires that you can correct mounting or replace bent or eccentric components before resetting slack. Write down any uncertainty that still needs a drawing, manual, or supplier response.
Inspect uneven wear and roller condition
First, look for localized elongation, cracked or flat rollers, worn bushings, and damaged plates along the entire loop. That step is tied to wear can concentrate in sections exposed to heat, contamination, poor lubrication, or process spray. A practical observation is that one heavily worn section changes local pitch and engagement even when average elongation remains below a limit. Missing it can lead to averaging the entire chain can hide a short damaged zone.
For evidence, measure several multi-pitch spans around the loop and compare roller diameters and articulation. Finish when you can replace the chain when local damage or uneven wear prevents consistent engagement. Retain enough context to distinguish a new-chain dimension from a wear-affected measurement.
Check alignment and side interference
Treat verify sprocket alignment, guide clearance, and whether plates or pins rub guards, rails, or machine structure as the control point. The reason is side contact can wedge a link or distort plate position only at certain chain locations or tension states. Real installations also show that thermal expansion and guard movement can make intermittent interference appear only during production. The likely consequence of error is increasing chain tension can worsen side friction and make the tight spot more severe.
Make the check at the machine: inspect shiny side wear, scrape marks, guide clearances, and axial sprocket position through a full chain cycle. The release criterion is to remove interference and realign the chain path before replacing parts. Record whether the drive was stopped, loaded, warm, cold, clean, or contaminated as relevant.
Restore lubrication only after removing contamination
Do not choose the hardware until you clean accessible joints with a suitable method and reapply lubricant that can penetrate the pin-bushing interface. This matters because dirt trapped in a joint can prevent articulation and abrasive debris can continue wearing the surfaces under fresh oil. Remember that external spraying cannot repair a joint already damaged by corrosion or peening. If ignored, running a seized link until lubricant works in can fracture rollers or plates.
Validate with a repeatable observation: inspect whether the pin surface shows clean lubricant film after treatment and whether the joint moves freely unloaded. Move on after you can replace any joint that remains stiff, rough, or dimensionally damaged after proper cleaning and lubrication. Preserve the source of any numerical limit that belongs to a specific chain series.
Diagnostic confirmation table
| Decision point | Inspection or calculation | Acceptance evidence |
|---|---|---|
| Determine whether the tight point follows the chain or sprocket | measure span tension or deflection at several rotations and log both chain mark and sprocket position | classify the tight spot as chain-synchronous, sprocket-synchronous, or load-dependent before disassembly |
| Flex suspect joints individually | inspect side clearance, pin ends, connecting-link plate position, rust, and debris at the suspect joint | replace or correct the joint using the chain manufacturer procedure rather than forcing it free with repeated operation |
| Check sprocket eccentricity and shaft runout | use a dial indicator on suitable sprocket or shaft surfaces and compare readings around the full rotation | correct mounting or replace bent or eccentric components before resetting slack |
| Inspect uneven wear and roller condition | measure several multi-pitch spans around the loop and compare roller diameters and articulation | replace the chain when local damage or uneven wear prevents consistent engagement |
| Check alignment and side interference | inspect shiny side wear, scrape marks, guide clearances, and axial sprocket position through a full chain cycle | remove interference and realign the chain path before replacing parts |
| Restore lubrication only after removing contamination | inspect whether the pin surface shows clean lubricant film after treatment and whether the joint moves freely unloaded | replace any joint that remains stiff, rough, or dimensionally damaged after proper cleaning and lubrication |
| For this article, do not close the job until the tight spot evidence and every critical mating interface are recorded together. | ||
Some failures that look like chain problems are controlled by neighboring hardware. review tensioning hardware after the root cause is corrected helps illustrate that broader roller-chain tight spots context, while the acceptance criteria still come from the actual chain, sprocket, tensioning arrangement, and OEM documentation.
False fixes that hide the root cause
Release check: classify the tight spot as chain-synchronous, sprocket-synchronous, or load-dependent before disassembly.
Release check: replace or correct the joint using the chain manufacturer procedure rather than forcing it free with repeated operation.
Release check: correct mounting or replace bent or eccentric components before resetting slack.
Release check: replace the chain when local damage or uneven wear prevents consistent engagement.
Troubleshooting FAQs
Correct the confirmed mechanism and verify the repair
Release the work only when the record connects tight spot and stiff link to the physical condition verified in “Restore lubrication only after removing contamination.” Include photos or measurements where they clarify the interface, and reference the document that owns any exact limit. The industrial chain drive solutions can then be used to explore alternatives without losing the original engineering basis.
Do not hide a remaining assumption inside the purchase description. send the application data to the chain engineering team with the machine duty, measured interfaces, photographs, and the unresolved question around sprocket eccentricity. A clear uncertainty is actionable; an undocumented guess becomes a future troubleshooting problem.
Send the operating condition, tight spot, stiff link, layout evidence, and the unresolved interface so the next decision is based on machine data rather than assumption.