Define inputs before using the equation
The quickest way to make this decision reliable is to define the operating condition first and postpone the chain number until the interfaces are known. A chain-length calculation is a geometry estimate that must end with a buildable number of pitches. The final answer must also fit the machine take-up range, connecting method, and actual sprocket centers.
The available transmission chain families is most useful once the problem statement includes chain length and center distance. In this article the controlling verification is to confirm the value represents the operating geometry and not the end of the take-up slot. Keeping those facts together gives purchasing and maintenance the same technical basis for the next action.
- Chain Length
- Karar verilmeden önce bu girdiyi bir çizimden, ölçümden, hesaplamadan veya işletme kaydından alın.
- Center Distance
- Bunu kontrollü bir değişken olarak ele alın; değerini, birimini, çalışma durumunu ve kaynağını iş kaydına not edin.
- Dişli Sayısı
- Bu öğeyi görünüşüne bakarak tahmin etmek yerine, fiziksel sürücü ve mevcut tedarikçi verileriyle karşılaştırarak doğrulayın.
- Chain Pitches
- Uygun olmayan seçenekleri erken aşamada reddetmek ve doğrulanmış değeri nihai spesifikasyon için saklamak için bu parametreyi kullanın.
- Take-Up Travel
- Makinedeki bu noktayı kontrol edin ve tedarikçi çizimi veya kılavuzu gerektiren herhangi bir belirsizliği belgeleyin.
Measure center distance at the shaft centers
Measure or obtain the designed distance between the two shaft axes rather than between sprocket rims or guards. Why it matters: the chain-length equation uses pitch-center geometry referenced to shaft centers. Field nuance: an adjustable motor base can have a range rather than one fixed center distance. Failure mode: using a casing dimension instead of center distance produces a systematic length error.
Inspection: measure shaft-center spacing with the take-up near its intended installation position and record the adjustment range. Release condition: confirm the value represents the operating geometry and not the end of the take-up slot. Record the operating state and the reference points used for this check.
Use actual sprocket tooth counts
Start by count or confirm the teeth on both sprockets and identify which is smaller and larger. The mechanism is tooth counts determine the wrapped chain length and the ratio between shaft speeds. In practice, replacement sprockets are sometimes changed without updating old documentation. If the assumption is wrong, using obsolete tooth counts can make the calculated chain length and speed ratio wrong.
Field check: mark one tooth and count around each sprocket or use the approved drawing and part number. Accept the step when you can verify the counted teeth agree with the required ratio and installed components. Save the measured or observed condition so the result can be repeated later.
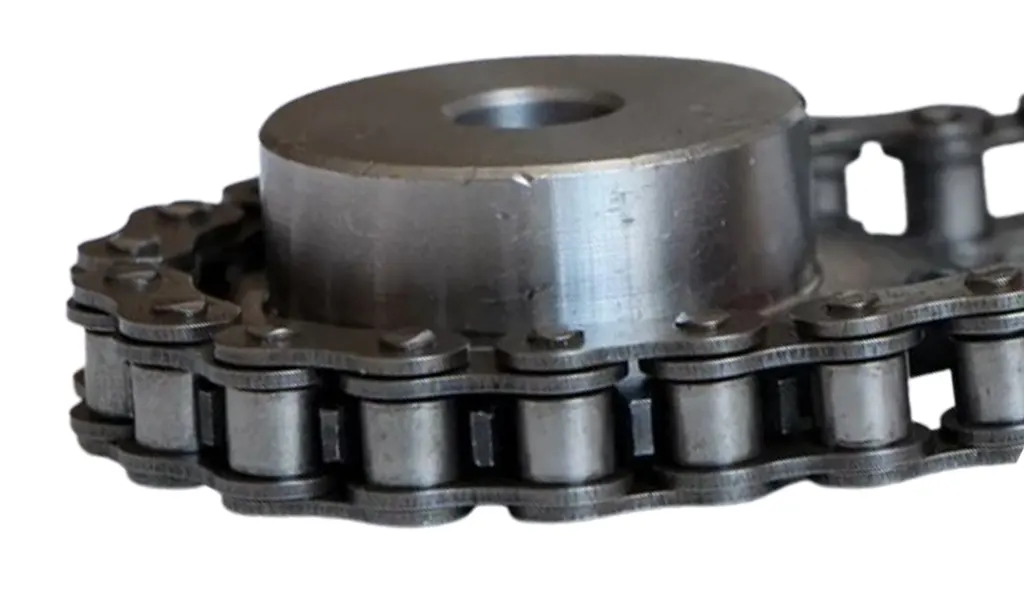
Normalize center distance by chain pitch
Use divide center distance by the chain pitch before using the common pitch-count equation. This controls the decision because the standard approximate formula is expressed in dimensionless pitch units. On the machine, mixing millimeters and inches or using center distance directly in a normalized term breaks dimensional consistency. The practical risk is an apparently small unit error can change link count enough to exhaust take-up travel.
Confirm it by doing this: write center distance and pitch in the same unit, calculate C/p, and retain several decimals. The evidence is sufficient when you can confirm the normalized center distance is plausible for the physical layout. Note the tool, location, and operating condition with the result.
Calculate theoretical length in pitches
Work from use the two-sprocket approximation that includes two center-distance terms, half the total tooth count, and a correction for tooth-count difference. The engineering link is the correction term accounts for unequal sprocket radii and becomes more important as the ratio grows or centers shorten. One useful detail is that the formula produces a fractional pitch count even though a real chain must be assembled from discrete links. Otherwise, rounding too early can create a strand that cannot be installed or leaves the take-up at an extreme.
Verify at the drive: calculate the unrounded pitch count, then compare adjacent practical whole-link choices. Close this check only after you can select a buildable link count only after checking the resulting center distance and adjustment position. Keep photographs or dimensions when they help preserve the interface condition.
Resolve odd pitches and connecting hardware deliberately
Base the decision on check whether the chain series and duty permit the connecting-link or offset-link arrangement needed for the chosen pitch count. It matters because some drive layouts naturally calculate close to an odd number of pitches while preferred assembly practices may favor even counts. During service, an offset link can have different strength characteristics from the regular chain depending on series. A poor assumption can cause forcing a link-count choice without checking connection hardware can weaken or complicate the strand.
Use this confirmation: review the chain manufacturer instructions for connecting and offset links and the available adjustment range. Proceed when you can choose a link count and connecting method explicitly approved for the chain and duty. If readings vary around the chain or sprocket, retain the spread instead of hiding it in one average.
Validate the result on the machine
The controlling action is to place the take-up at the planned installation position and verify slack, wrap, guard clearance, and future adjustment travel. Its significance comes from calculated geometry does not include every real installation tolerance, wear condition, or shaft-setting error. In the field, a theoretically correct chain can still leave no travel for tension adjustment or wear compensation. The failure consequence is starting at the end of a take-up slot increases maintenance difficulty and may require early link removal.
Check the hardware directly: mock up the sprocket centers in CAD or install the measured chain with the machine safely isolated. Approval requires that you can confirm usable slack and adjustment remain on both sides of the initial setting. Write down any uncertainty that still needs a drawing, manual, or supplier response.
Calculation and validation table
| Karar noktası | İnceleme veya hesaplama | Kabul kanıtı |
|---|---|---|
| Measure center distance at the shaft centers | measure shaft-center spacing with the take-up near its intended installation position and record the adjustment range | confirm the value represents the operating geometry and not the end of the take-up slot |
| Use actual sprocket tooth counts | mark one tooth and count around each sprocket or use the approved drawing and part number | verify the counted teeth agree with the required ratio and installed components |
| Normalize center distance by chain pitch | write center distance and pitch in the same unit, calculate C/p, and retain several decimals | confirm the normalized center distance is plausible for the physical layout |
| Calculate theoretical length in pitches | calculate the unrounded pitch count, then compare adjacent practical whole-link choices | select a buildable link count only after checking the resulting center distance and adjustment position |
| Resolve odd pitches and connecting hardware deliberately | review the chain manufacturer instructions for connecting and offset links and the available adjustment range | choose a link count and connecting method explicitly approved for the chain and duty |
| Validate the result on the machine | mock up the sprocket centers in CAD or install the measured chain with the machine safely isolated | confirm usable slack and adjustment remain on both sides of the initial setting |
| For this article, do not close the job until the chain length evidence and every critical mating interface are recorded together. | ||
For a wider view of the hardware around this problem, see review sprocket tooth-count and bore options. Use that page only as context for roller chain length calculation; approve the real drive from measured interfaces, current ratings, and the machine duty described in this article.
Calculation mistakes that distort selection
Release check: confirm the value represents the operating geometry and not the end of the take-up slot.
Release check: verify the counted teeth agree with the required ratio and installed components.
Release check: confirm the normalized center distance is plausible for the physical layout.
Release check: select a buildable link count only after checking the resulting center distance and adjustment position.
Calculation FAQs
Release the result only after a physical cross-check
A finished calculation decision should let another engineer reproduce it without relying on memory. Keep chain length, center distance, the final check for “Validate the result on the machine,” and the governing catalog or drawing revision together. If another chain architecture becomes relevant, the chain drive engineering solutions is a starting point, not a replacement for those recorded inputs.
For an application-specific review, send the application data to the chain engineering team and identify what is known versus what remains uncertain. Include the values for chain length and center distance, plus the current condition of sprocket tooth count. A supplier can then evaluate a bounded engineering question instead of trying to infer the machine from a chain designation alone.
Send the operating condition, chain length, center distance, layout evidence, and the unresolved interface so the next decision is based on machine data rather than assumption.